To redistribute List & Label to end users no modules need to be registered and no files need to be copied to the system directory. Your application can therefore be installed on the end user's machine by simply copying the modules (xcopy Installation).
Before redistribution you have to enter your personal license key in the LicensingInfo property of the component. This key enables List & Label to determine the feature range that is available in the application according to your edition (, Professional or Enterprise). Your personal license key can be found in the file "PersonalLicense.txt".
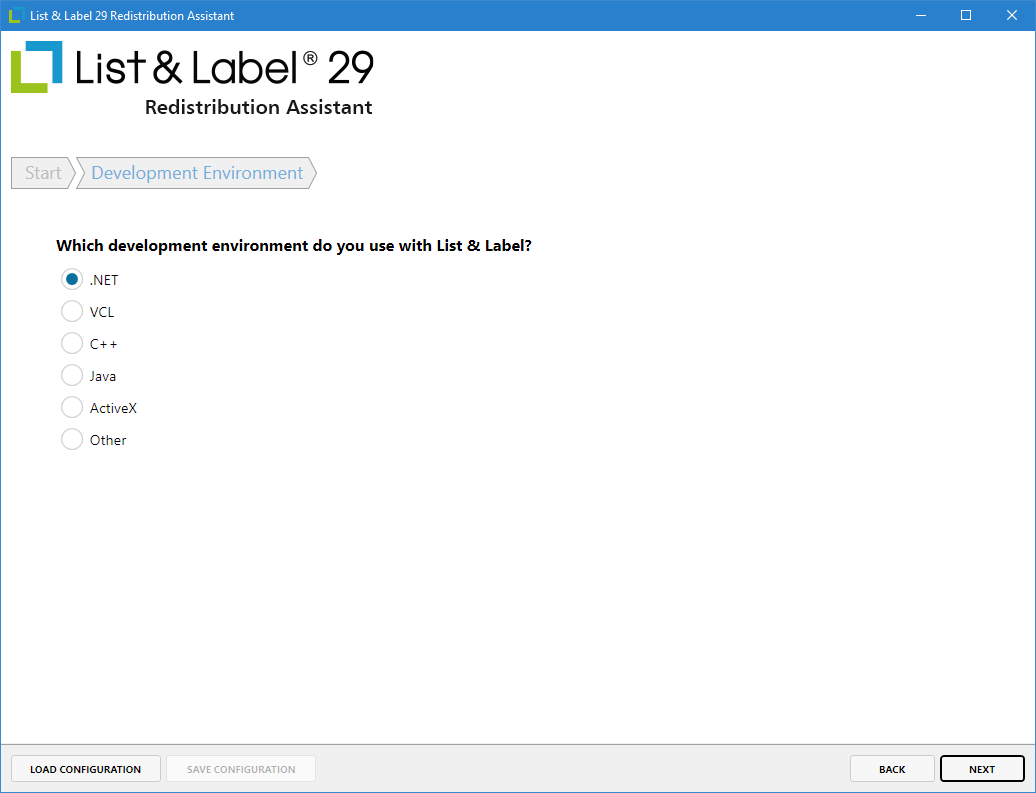
Redistribution Assistant
The Redistribution Assistant is available for putting together the redistribution files. In just a few steps, you can put together all the files required for your application and copy them directly to the correct target directory, create a ZIP archive or copy the file paths for further batch processing. The Redistribution Assistant can be found in the List & Label installation directory.
NuGet Package Support
On GitHub you find an introduction to use NuGet. The List & Label installation contains NuGet packages for offline usage. They are installed into the directory "..\Samples\Microsoft .NET\NuGet\" and can simply be used in Visual Studio:
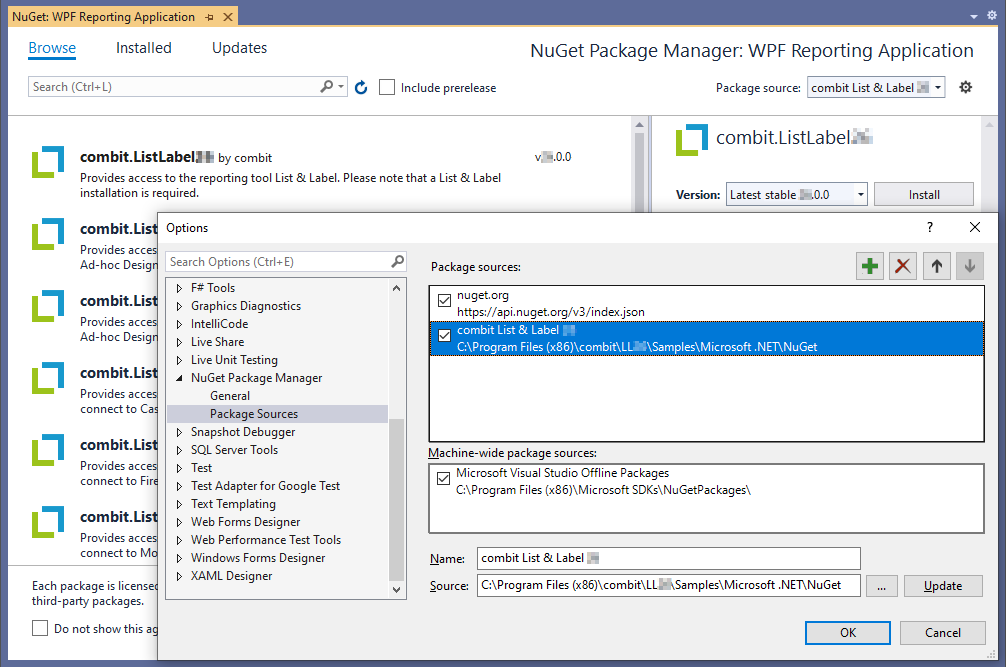
But of course you can also download them directly from NuGet.org itself.
Hints
The List & Label NuGet Packages only contain the selected .NET assemblies. While building your project the unmanaged binaries of List & Label are copied from your installation directory "..\Redistribution\" to your output folder and are not part of the NuGet package. Therefore when updating the NuGet package, please note that you also have to install the corresponding List & Label Service Pack. This way, the unmanaged binaries' version matches the .NET assemblies of the NuGet package. In .NET System Architecture finden Sie weitere Details zu den .NET assemblies und den unmanaged binaries.
Enterprise Edition: Furthermore, special NuGet packages are available for the List & Label Enterprise Edition that contain all modules and do not require a List & Label installation and are therefore suitable for use on e. g. build servers like Azure DevOps. Your personal NuGet feed for use e. g. in the Visual Studio NuGet Package Manager can be found in the file PersonalLicense.txt in your List & Label installation. Please note that your List & Label license must be registered for this purpose. When using these NuGet packages on a build server, you usually need a nuget.config file (see below), which must be located in the directory of the corresponding project file, to specify where the NuGet packages should be obtained from (see nuget.config reference for more information). Incidentally, the use of a nuget.config file is helpful for the same reason if you have defined multiple package sources that contain List & Label NuGet packages.
xcopy Installation
In the subfolder "Redistribution" of your List & Label installation you can find all redistributable files. Usually you will use all files (cm*.dll) and the additional modules (cm*.llx), as well as the assembly that is referenced by your application and at least one set of language files (cm*.lng). For 64-Bit you'll use the files from the x64-subfolder (cx*.dll and cm*.dll).
ClickOnce Deployment
In order to enable ClickOnce deployment for your VS project you need to add all dependencies to it. As List & Label also depends on the availability of other files, you need to add these dependencies, too. In order to do so, proceed as follows:
1. Create a folder for the dependencies. Right click the project in solution explorer, choose "Add > New Folder" and call the new folder "LLFiles".
2. Add the dependencies to the project. Right click the "LLFiles" folder and choose "Add > Existing Item...". Now select the List & Label redistributables from the "Redistribution" folder. The files are also listed in the "Redist.txt" file in the subfolder "Documentation" of your installation.
3. Select the just added files and set the "Build Action" property to "Content".
4. Finally, you have to set the installation target path for the List & Label files. In order to do so, you need to manually edit the project file (*.csproj/*.vbproj) with a standard ANSI editor (ex. Notepad). Within the "ItemGroup" block, add a "PublishFile" block for each file:
<Project DefaultTargets="Build" xmlns="http://schemas.microsoft.com/developer/msbuild/2003">
...
<ItemGroup>
<PublishFile Include="LLFiles\cmLL31.dll">
<Visible>False</Visible>
<TargetPath>cmLL31.dll</TargetPath>
<PublishState>Include</PublishState>
<FileType>File</FileType>
</PublishFile>
<PublishFile Include="LLFiles\cmct31.dll">
<Visible>False</Visible>
<TargetPath>cmct31.dll</TargetPath>
<PublishState>Include</PublishState>
<FileType>File</FileType>
</PublishFile>
<!-- Add the additional files here -->
</ItemGroup>
</Project>
After saving and reloading your project you can now ClickOnce deploy your application.
Important: Backup your project file before manually editing it! Please note that Visual Studio re-enables the "ClickOnce Security Settings" with each build of the ClickOnce deployment. If you're using Windows-NT operating systems, this leads to an error message whenever trying to debug the application from the IDE or starting the application. In order to debug your application, switch off the "ClickOnce Security Settings" checkbox from the solution's secutity properties. This has to be done every time you build the ClickOnce deployment.